How To Make Compost

It’s true. It’s called compost, and if you’ve been an organic gardener for a while, you know all about it. If you’re new to organic gardening, then you’ve come to the right place.
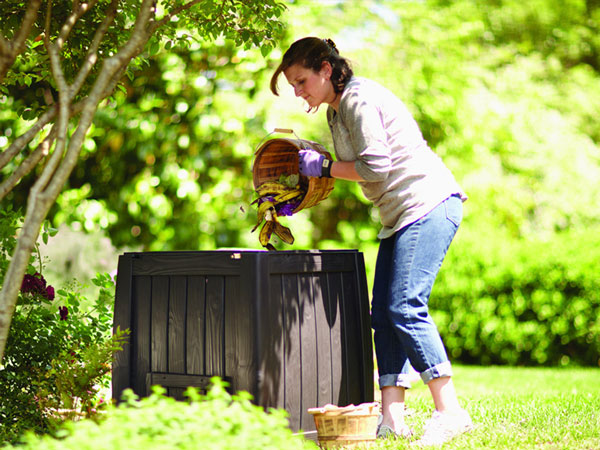
Recycling paper, plastic and glass has become routine by now for many families, but composting – recycling your “plant-based” kitchen trash and yard waste — is a gift you give to your garden. Instead of tossing overripe bananas, coffee grounds and carrot peelings in the trash, toss them on a compost pile with some dry leaves, and let Mother Nature do the work. The result is what’s commonly referred to as “black gold”. It is magical stuff, and it will morph your soil from poor to rich in just a couple of seasons. Compost is fertilizer of such high quality that you can’t find it in a garden center or even online. (Whatever you might see online is mostly a mix of decomposed bark, peat moss and timber-industry waste. It’s the kitchen scraps that make the difference.)
What — and what not — to compost
Interested in making the real thing? Composting is easy, and there’s really no wrong way to do it. You only have to be conscious of what goes in it.
Here’s a list of what you can safely compost:
- Wood shavings and sawdust (untreated lumber only)
- Straw
- Grass clippings (untreated with chemical applications)
- Pulled weeds
- Shredded bark
- Small sticks and twigs
- Fallen leaves (shredding them with a lawn mower speeds the process)
- Deadheaded flowers
- Any formerly edible kitchen waste, including paper towels and coffee filters
- Eggshells
- Spent garden plants (unless they were diseased)
- Paper-shredder contents (unless you’re already recycling them)
What you should not compost:
- Large tree limbs
- Human or pet waste (unless you have pet chickens or sheep)
- Bones
- Plastic wrappers or containers
- Styrofoam peanuts
- Dairy products
Compost materials are generally categorized as “green” (fresh grass clippings, kitchen waste) and “brown” (dry fallen leaves, straw). A ratio of 30 parts "brown" to one part "green" will give you usable compost in the shortest amount of time. Your yard and kitchen will probably generate more green than brown, so keep a supply of “brown” handy (like a stash of leaves from the previous fall) to keep the ratio properly balanced.
Starting the pile
Creating a pile is extremely simple. Just accumulate items from the “good list” above, and mix the pile up with a pitchfork or compost aerator once a week. If you have a tumbler, turn it once a day. If it’s dry, water it. That’s it.
The breakdown process happens in one of two ways: the compost material sits there and naturally decomposes, or you manually turn it (or a tumbler turns it) to accelerate the process. You can also use some compost starter to move things along more quickly. The result is the same; the “lazy gardener way” of simply leaving it be just takes longer to arrive at the final result.
Managing your compost
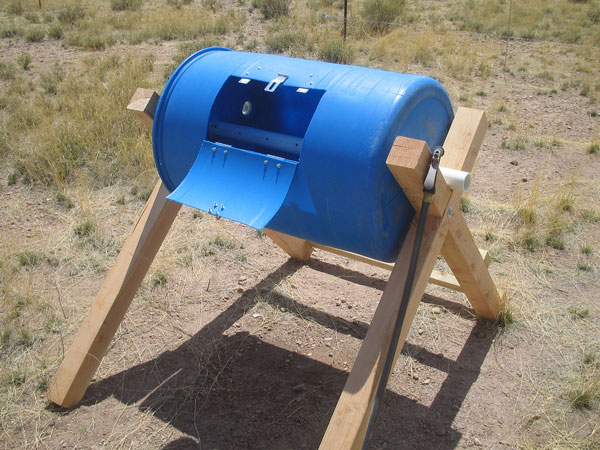
You can construct or buy a double- or triple-bin system, a single or double tumbler, a worm bin — or you can just have a pile. They all work. (Soon we’ll post a pros-and-cons article about the different compost-storage options.) The bigger the garden, the more compost you will need. The more compost you need, the bigger the space you’ll need to make/store it. If you need a lot, it’s most efficient to maintain a large pile. If you just have a small kitchen garden and yard, a bin or tumbler will do the job a little more neatly and quickly. A tumbler is especially useful for older gardeners who may have trouble turning a large pile.
Whichever method you choose, be sure the location is easy to access, and that if you do plan to turn the compost, that you have adequate elbow room to do so. A spot that gets full sun is best (the heat will break the pile down faster), but even part-sun will do.
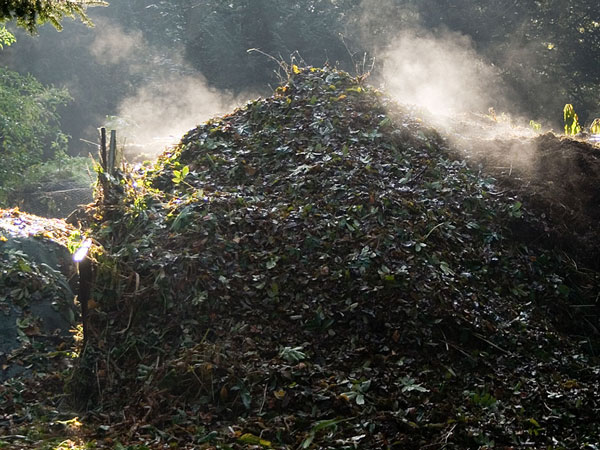
Compost-in-process is not beautiful, and so if you have a large pile you may want to consider a decorative fence, which will also do double-duty as a pile support.
About moisture: Ideally, your compost pile should feel like a sponge that is consistently damp throughout. If it’s too wet, it will smell awful. (Add some more dry ingredients and turn the pile to distribute excess moisture. Cover with a tarp during rainy spells until the pile dries out a bit.) If it’s not wet enough, it won’t be “cooking.” (Water it lightly, then turn it to wet the pile and get it going again.) A proper compost pile will be warm, even when it’s cold outside.
Turning the pile
This is a chore, there’s no two ways about it. You can simply let it be and compost will be made, but the more you turn it, the faster you can get your hands on that “black gold”. A tumbler is much easier, but it takes many “batches” to get a sizable amount of compost.
Using your “black gold”
Once your compost is finished, it will be dark and crumbly, and smell wonderfully earthy. You can further refine the texture by shaking it through a compost sifter, or just let the bigger bits (no bigger than an inch or so, though) continue to decompose in your planting beds.
Spread your valuable compost around your flower and vegetable beds, at the drip line of shrubs and on your lawn, if you have enough. Once you see the results, you’ll want to make more and more. Compost is like Champagne for your garden on a beer budget. Start a pile and watch your garden grow!
A final tip: You can also use it to develop strong root systems on your indoor seed starts. Add ¼ cup of finished compost to each quart of seed-starter potting mix and combine well before planting your seeds.
Latest Articles
 The Healing Power of Your Garden: Growing Plants for Apothecary and Wellness
Why You Can’t Eat Raw Elderberries (and How to Enjoy Them Safely)
When to Pick Asian Pears: Harvesting Tips for Crisp, Juicy Fruit
Summer Raspberry Pruning Tips with Matt Lebon of The Foodscaper
Backyard Orchard Tour: Growing Fruit in Small Spaces with Stark Bro’s Team Member Katie B
How To Prune Grapes - Summer Care
How to Make Redbud Jelly
Winter Preparation for Fig Trees: Cutting Back and Mulching
Indoor Gardening with Purpose: Fresh Ingredients Year-Round
The Healing Power of Your Garden: Growing Plants for Apothecary and Wellness
Why You Can’t Eat Raw Elderberries (and How to Enjoy Them Safely)
When to Pick Asian Pears: Harvesting Tips for Crisp, Juicy Fruit
Summer Raspberry Pruning Tips with Matt Lebon of The Foodscaper
Backyard Orchard Tour: Growing Fruit in Small Spaces with Stark Bro’s Team Member Katie B
How To Prune Grapes - Summer Care
How to Make Redbud Jelly
Winter Preparation for Fig Trees: Cutting Back and Mulching
Indoor Gardening with Purpose: Fresh Ingredients Year-Round