Garlic Harvesting, Curing & Storage: When & How
Here are some general guidelines for when to harvest garlic:
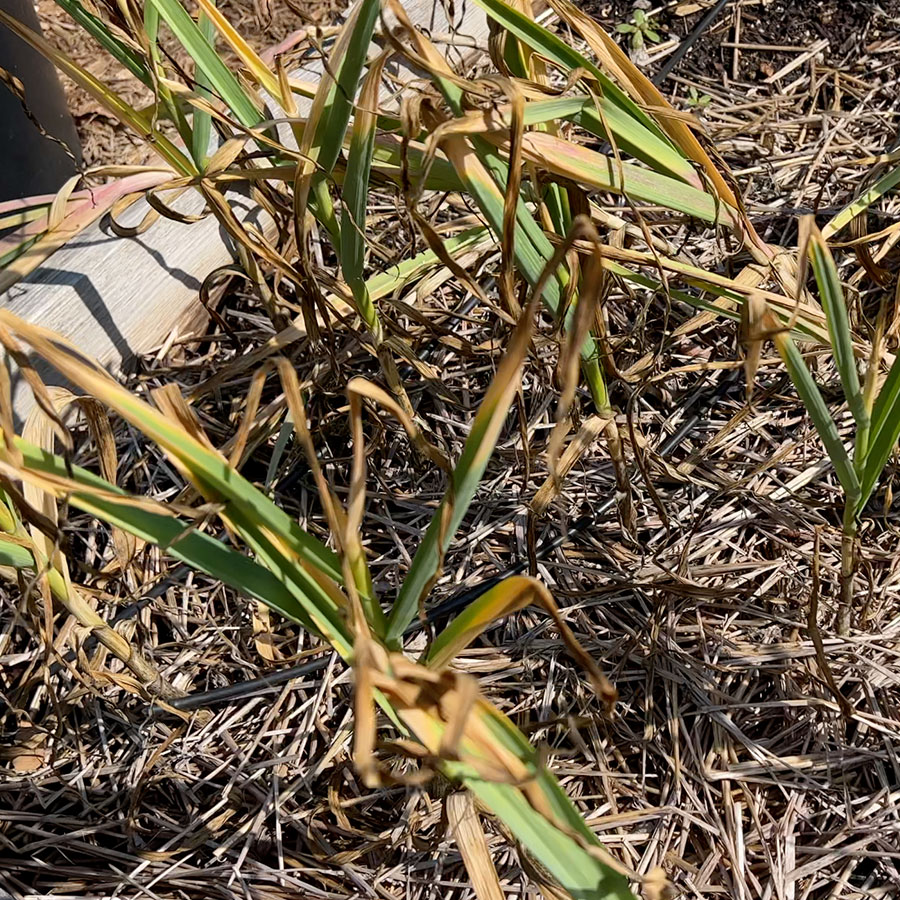
Observing the leaves: Watch the leaves of the garlic plant closely. When about half of the leaves have turned yellow or brown and started to dry out, it's usually a good indicator that the bulbs are ready for harvesting.
Checking bulb size: Garlic bulbs should have developed to a reasonable size. You can gently dig around the base of a plant to check the bulb size without pulling it out completely. If the bulbs seem large and well-formed, they are likely ready for harvest.
Time of planting: Garlic is typically planted in the fall or early winter. The time from planting to maturity can vary depending on the variety, but it's usually around 8 to 10 months.
Climate and growing conditions: If you're unsure about the readiness of your garlic, you can consider the local climate and growing conditions. In warmer climates, garlic may mature earlier than in colder regions.
How to Harvest Garlic:
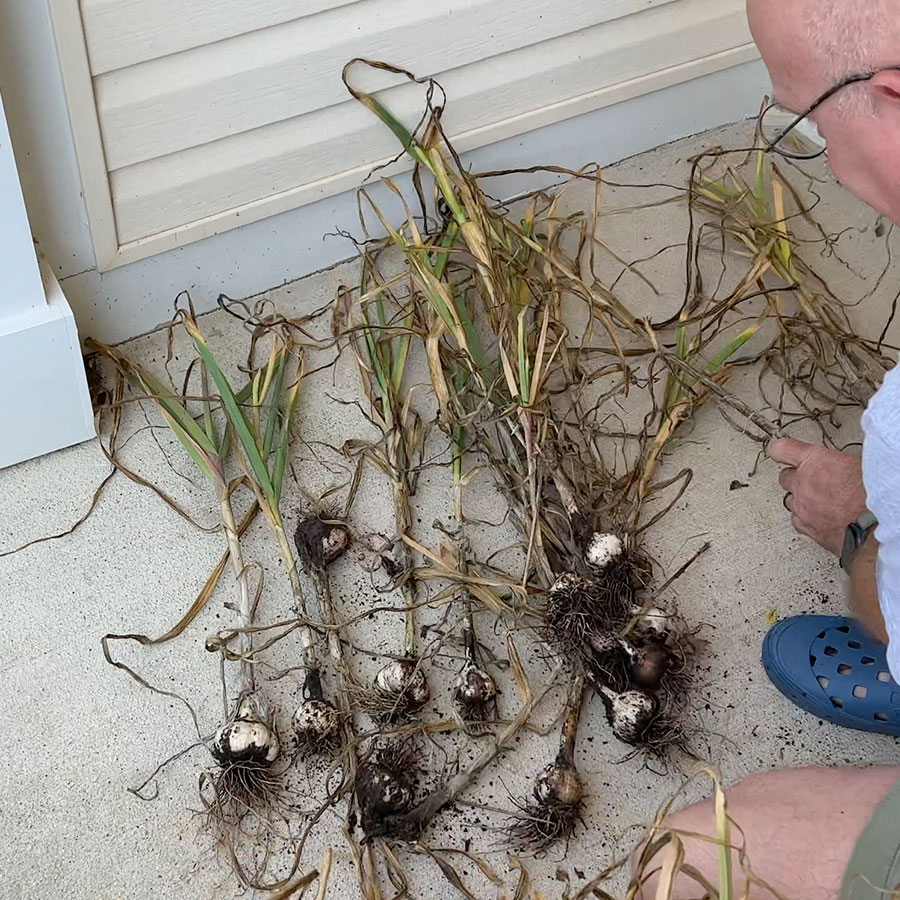
To harvest garlic, use a shovel, or pull by hand to carefully loosen the soil around the bulbs. Be cautious not to damage the bulbs during the process. Once the bulbs are out of the ground, gently brush off excess soil.
How to cure Garlic: Curing garlic is an essential step in the harvesting process that helps improve the flavor and storage life of the bulbs. Curing allows the garlic to dry out and allows the protective papery skin to form around the cloves. Here's a step-by-step guide on how to cure garlic properly:
Harvest at the right time: As mentioned earlier, harvest the garlic when about half of the leaves have turned yellow or brown and started to dry out. Avoid waiting too long, as overripe garlic may not store well.
Cleaning the bulbs: Gently brush off excess soil from the garlic bulbs, but do not wash them with water. Washing can introduce moisture and hinder the curing process.
Dry the garlic: Hang the garlic, or lay it out in a shaded area with good ventilation. This will ensure the garlic dries and cures
Allow proper airflow: Ensure there is good air circulation around the garlic bulbs during the curing process. This will help prevent mold and mildew growth while the garlic dries.
Cure: The curing process typically takes around 2 to 4 weeks, depending on the humidity and temperature of your curing location. The garlic is ready when the outer skin becomes papery, and the cloves feel firm.
Check for readiness: To check if the garlic is properly cured, try braiding the leaves together. If they are still pliable and soft, the garlic needs more time to cure. If they are brittle and dry, the garlic is ready for storage.
Trim the roots and leaves: After curing, trim the roots and cut the leaves about an inch above the bulb. This tidies up the garlic bulbs for storage.
How to Store Garlic:
Storage: Store the cured garlic in a cool, dry, and well-ventilated place. An ideal storage location is a mesh bag or a well-ventilated wooden crate. Do not store garlic in sealed plastic bags or containers, as it needs to breathe.
By following these steps, you can ensure that your garlic is properly cured and ready to enjoy for several months. Properly cured and stored garlic can last up to 6-8 months, depending on the variety and storage conditions.
Remember that it's essential to avoid leaving the garlic in the ground for too long after it's matured, as overripe garlic can split, and the bulbs may not store well. Additionally, avoid watering the garlic for a week or so before harvesting, as this can help with the curing process and prevent mold issues during storage.

Latest Articles
 The Healing Power of Your Garden: Growing Plants for Apothecary and Wellness
Why You Can’t Eat Raw Elderberries (and How to Enjoy Them Safely)
When to Pick Asian Pears: Harvesting Tips for Crisp, Juicy Fruit
Summer Raspberry Pruning Tips with Matt Lebon of The Foodscaper
Backyard Orchard Tour: Growing Fruit in Small Spaces with Stark Bro’s Team Member Katie B
How To Prune Grapes - Summer Care
How to Make Redbud Jelly
Winter Preparation for Fig Trees: Cutting Back and Mulching
Indoor Gardening with Purpose: Fresh Ingredients Year-Round
The Healing Power of Your Garden: Growing Plants for Apothecary and Wellness
Why You Can’t Eat Raw Elderberries (and How to Enjoy Them Safely)
When to Pick Asian Pears: Harvesting Tips for Crisp, Juicy Fruit
Summer Raspberry Pruning Tips with Matt Lebon of The Foodscaper
Backyard Orchard Tour: Growing Fruit in Small Spaces with Stark Bro’s Team Member Katie B
How To Prune Grapes - Summer Care
How to Make Redbud Jelly
Winter Preparation for Fig Trees: Cutting Back and Mulching
Indoor Gardening with Purpose: Fresh Ingredients Year-Round