Natural Holiday Ornaments

For our ornaments, we used Gala apples, Meyer lemons, Calamondin oranges, and Key limes… although Persimmons would be beautiful, too! Most of these fruits you can grow in a wide range of climates in a container.
Depending on the style of your tree and decor, you could do these with only the natural dried fruit and some burlap or twine, or if glitter and ribbons are more your style, these look amazing covered in extra fine glitter! We also recommend stringing American Cranberries as a natural garland.
These simple, natural ornaments bring the personal touch of your garden into your home this winter. Make one for everyone on your Christmas list for a thoughtful, handmade gesture.
There’s no limit to the different ways you can customize these gifts, but here are the instructions for how we created ours:
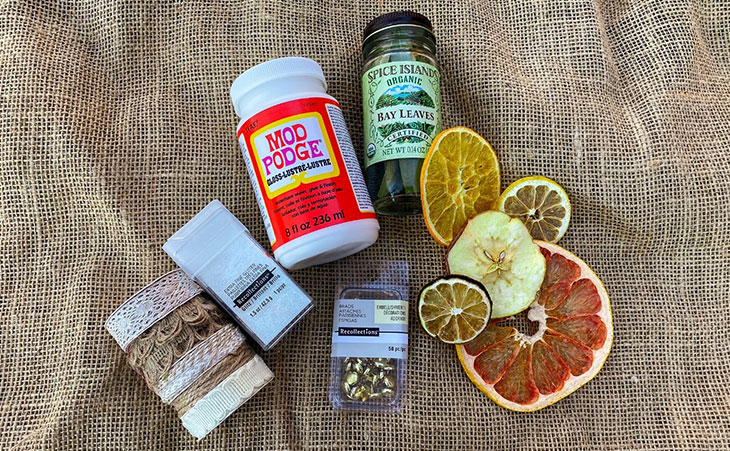
Supplies:
- Mod Podge Glue
- Scrapbooking Brads
- Extra Fine Glitter
- Bay Leaves
- Dried Fruit
- Bottled Lemon Juice
- Ribbon or Twine
Directions:
This can be done with an oven, with a dehydrator or even air drying the fruit. We’ll outline the steps for oven drying for you here:
- Pre-heat oven to 225 degrees
- Slice fruits to about ¼ an inch per slice. Don’t slide too thinly or they won’t hold the brad
- If you're using an apple, make sure to lie it on its side with the stem pointing sideways and cut through the core to create the “star” center of the apple
- Lay fruit on paper towels and pat dry as much as you can
- Squeeze bottled lemon juice over all fruit slices to help preserve color during the baking process
- Lay the citrus pieces directly onto the oven rack (placing the largest pieces towards the back) and bake for 2 to 3 hours until dry and firm
- Watch very closely! If they begin to brown, take out immediately
- Bigger/thicker pieces might take longer, so if the smaller pieces up front look done earlier, take them out
- When slices cool completely, you can begin decorating
- Cover slices with Mod podge, and while still wet, coat with glitter if desired
- Dip bay leaves in Mod podge and hold to the back of the fruit until it sticks, then lay out to dry
- Once glue is dried, cut pieces of ribbon to desired length
- Cut small holes (the size of the prong of the brad) in the back of the ribbon

Slide the brad through the top of the fruit (beneath the rind or skin) and through the two pieces of ribbon and secure
Enjoy this simple, natural holiday gift to share with the ones you love. We’d love to see what you create! Do you incorporate dried fruit in a different way in your holiday decorating?
Tag us with #starkbros on Facebook or Instagram to show us how yours turned out.
Latest Articles
The Healing Power of Your Garden: Growing Plants for Apothecary and Wellness
Why You Can’t Eat Raw Elderberries (and How to Enjoy Them Safely)
When to Pick Asian Pears: Harvesting Tips for Crisp, Juicy Fruit
Summer Raspberry Pruning Tips with Matt Lebon of The Foodscaper
Backyard Orchard Tour: Growing Fruit in Small Spaces with Stark Bro’s Team Member Katie B
How To Prune Grapes - Summer Care
How to Make Redbud Jelly
Winter Preparation for Fig Trees: Cutting Back and Mulching
Indoor Gardening with Purpose: Fresh Ingredients Year-Round