It's Time for Homemade Apple Butter


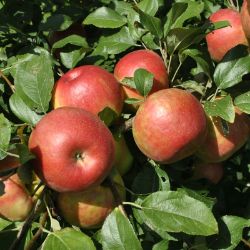
As your apple crop ripens in fall, be sure this homemade apple butter recipe is on your cooking list. Made in your slow-cooker, it's sure to please.
You’re probably beginning a list of plans for your apple harvest: applesauce, canned slices, juice, the usual. This year, why not try an apple butter recipe? Apple butter has more familiarity east of the Mississippi, but is a Southern staple and a fond Midwestern memory for kids who grew up in the ‘50s and ‘60s, when it was all the rage. For the uninitiated, it's simply super-reduced applesauce, cooked very slowly so that the sugar caramelizes and turns this fall treat into a sweet, deep brown spread that is utterly delicious.
Making it from scratch fell out of favor over the years, as people’s live became busier and busier. Homemade apple butter made the "old way" takes many hours of watching, stirring and watching some more, relegating it to the low-priority pile. These days, we have slow cookers, which do the watching for you and simplify the entire process with equal or better results!
For a small fortune, you can buy apple butter at the store or at a farm market, but making your own is much less expensive and you can control the sugar content. It’s fun to make with your kids and it’s quite nutritious if you rein in the sugar amount.
Homemade Apple Butter Recipe

For apple butter, you will need:
- 9 quarts of finished homemade applesauce (recipe follows)
- 2 tablespoons of ground cinnamon
- 1 teaspoon ground cloves
- 1/2 teaspoon nutmeg
- 2 to 4 cups sugar (or Stevia, or Splenda, or a blend to equal 2-4 cups)
- A 6-quart slow cooker (scale the recipe if your cooker is smaller)
- Large spoons and a large ladle
- Jars in which to store your apple butter (use canning jars, lids and screw-on bands if you plan to process them in a water bath* for shelf storage)
First, make the applesauce. This is a great way to make use of your dropped or imperfect apples!

For the apple sauce, you will need:
- ¾ bushel mixed sweet "meaty" apples like Red Delicious, Gala, Fuji, McIntosh or Winesap (do not use Granny Smith or Honeycrisp as they are not ideal for this purpose)
- About 1-½ cups apple juice or water
- Cinnamon to taste
- A large stockpot or heavy-bottomed pot with a lid
- A large spoon

Apple Sauce Instructions:
- Rinse the apples and cut into chunks. The best device is the kind that pushes down on the top of the apple and cores it and segments it into six wedges all at once. If you don’t have one of these, just cut the apples into chunks. You do not need to peel or core them.
- Put the prepared apples in your big pot and add the apple juice or water.
- Bring to a boil over high heat; reduce heat, cover and simmer until the apples are very soft. If there is a significant amount of juice on top of the apples, skim it off and chill it to drink later.
- Sieve the cooked apples using a food mill or mesh sieve (the food mill is considerably easier). This will remove the seeds and peel.
- Add as much cinnamon as you like. It should not need added sugar.
Makes 9 quarts of applesauce.

")
Now, for the apple butter:
- Put enough of your applesauce in the slow cooker so that you have about an inch of headspace at the top (about 5-½ quarts). You’ll add the rest of the applesauce later on. Set to low heat.
- Add the cinnamon, cloves, nutmeg and 2 cups of your desired amount/combination of sweeteners. (You can adjust the sweetness later. Some people don’t add any sugar at all to their apple butter; this is a personal preference. Taste it first and you can go from there.)
- Cook for 8 hours. If the applesauce has not significantly reduced, increase the heat to medium. Keep it loosely covered to avoid splatters by placing the cooker lid on top of a couple of chopsticks or skewers that have been laid across the rim. This will help to evaporate the liquid.
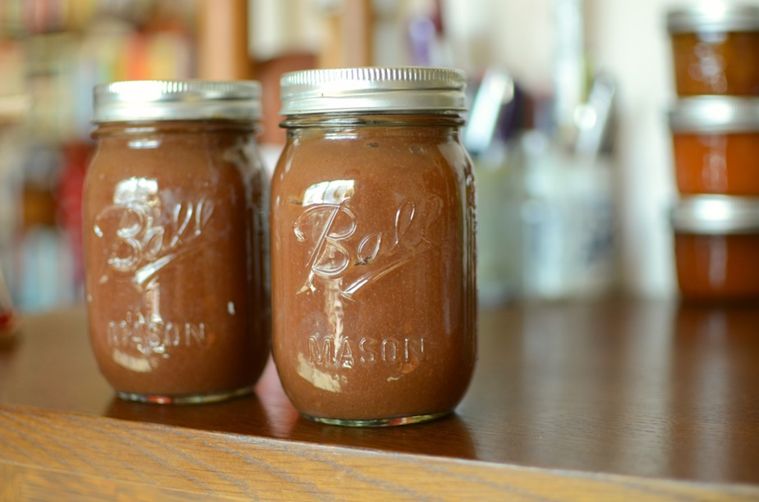
- Cook for additional 6-12 hours. The cooking time will depend upon the heat level and your thickness preference. If you’re going to cook overnight, make sure the heat is on low. Stir occasionally to prevent any scalded spots. By now, the volume should have reduced by half and be a dark brown color (see photo).
- Add the remaining 3-1/2 quarts of applesauce, taste for sweetness and add more sugar/sweetener, if necessary. Cook for 2 more hours. Apple butter is traditionally “done” when you can stand a wooden spoon up in it without it falling over. Too thick? Add a little apple juice. Too thin? Uncover and keep cooking until it’s the consistency you’re after.
- Optional: Use an immersion blender, food processor or the fine blade on a food mill to give your apple butter that perfectly smooth texture.
Makes 9-10 pints.
")
It will keep in your refrigerator for up to 3 months, or in the freezer for up to one year.
Uses for apple butter:
- Spread on toast, English muffins or graham crackers
- Drizzle through pancake batter
- Swirl it through oatmeal
- Mix into smoothies
- Spread on crêpes, waffles or make cookie sandwiches with apple butter filling
- Add a few tablespoons into your apple pie filling ingredients before baking
*You can also preserve your apple butter via the water-bath canning method, which uses a canning pot. The recommending processing time is 10 minutes for pints and 15 minutes for quarts. Home-canned apple butter has a shelf life of about two years. Store in a cool, dark place.


Latest Articles


 How to Make Redbud Jelly


 Winter Preparation for Fig Trees: Cutting Back and Mulching


 Indoor Gardening with Purpose: Fresh Ingredients Year-Round


 House Plants: Benefits, Top Picks, and Care Tips


 The Stark Bro's Story of Leadership in Gardening Excellence


 Preparing Your Garden for a Successful Fall and Winter


 How to Prep a Garlic Bed for Planting


 How to Care for Citrus Trees in Containers & Successfully Grow Citrus Indoors


 When Grapes Are Ready to Harvest: A Guide to Determining Ripeness